

BEAUTY / FROM MY MIRROR / BY STACEY SAVARESE
Hooded Eye Makeup for a Lifted Look, Even When One Lid Sits Lower
A little less product, a much smarter map, and one final look with both eyes open.
Illustrative makeup images show the techniques; they are not photographs of Stacey.
Two or three years ago, I noticed something small in the mirror: the outer corner of my left eyelid had begun to sit just a little lower. I could raise my eyebrows, and the right eye would come along for the ride. That left corner? It seemed to have other plans. It just lagged behind!
I am not interested in pretending every face is perfectly symmetrical. But I am interested in the makeup I spent time and money applying to stay visible when I open my eyes.
A beautiful crease color that vanishes in the fold is not doing much for me, and a thick swipe of eyeliner can take up the little lid space I do have. Not ready for Botox or anything surgical, I decided to invest time into how to open my laggy eyelid.
The approach I want to share is not a new face, just a few thoughtful placement tricks for that hooded eye with makeup and one tool that I swear by!
The guiding rule is wonderfully simple: look straight ahead, relax your brows, and work with the eyes you actually take out into the world.
A quick distinction: Makeup can make an eye look more open; it does not lift the eyelid itself. A new, sudden, or worsening droop, double vision, pain, or a change in sight is a reason to speak with an eye-care professional. Cleveland Clinic has guidance on drooping eyelids.
The Face Tool I Actually Keep Using
I did try a face-and-neck sculpting wand, and I was super surprised by it. But yes, it works for me! I prep with this tool. After about a few minutes of the red light and massage it somehow magically lifts that eyelid. I look more rested and “lifted” all over.
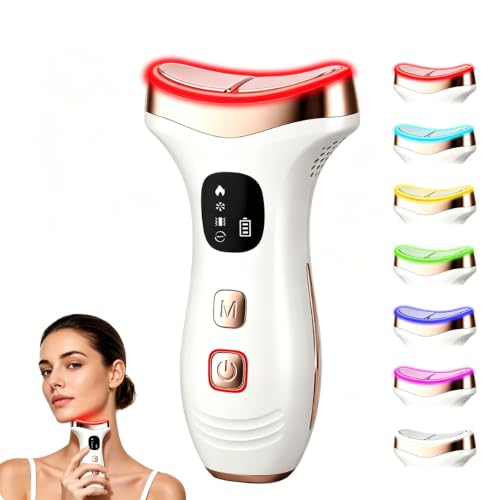
This face-and-neck massager offers seven light settings, six care modes, and four intensity levels, with warming, cooling, and vibration options for a customizable skincare routine.
The outer part of my left eye looks more lifted to me for a few hours. I just love it and feel more confident.
That is my own observation, not a claim about what it does to a muscle or a promise that it will work for anyone else. I have not verified the exact model’s directions for the eye area, so I would not recommend placing a device on the eyelid or near the eye based on my experience alone. I use it right above my eyebrow to encourage the lift.
That little temporary change is one thing. Makeup is another. What I can control with a brush is the appearance of balance, and these are the details worth getting right.
THE MIRROR RULE / 01
Make The Map With Your Eyes Open
Before I pick up a brush, I look straight ahead. Relax the eyebrows. Heel of my hand is at chin level. No tugging the skin taut, and no “surprise” eyebrow lift to make more room.
The space I can see with my eyes open is the real canvas.
That matters even more when one lid is a little lower.
The goal is not identical strokes on each eye. Cousins, not twins. The goal is an even-looking result when I am facing somebody. Not when I am staring down into a compact.
Bobbi Brown’s hooded-eye lesson also emphasizes eyes-open placement, because shadow hidden in the crease will disappear once you look up.


24-Hour Eyeshadow Stick | High-Pigment, Buildable Shades with Three Finishes

24-Hour Waterproof, Smudge-Proof Eyeliner with Fine Tip and Built-In Sharpener | Creamy Matte Finish for Smokey Eye Makeup

Long-Wearing, Volumizing Mascara | No Flaking or Smudging
Mirror check: Can you see the planned shadow area on both sides without raising either brow?
THE SHADOW / 02
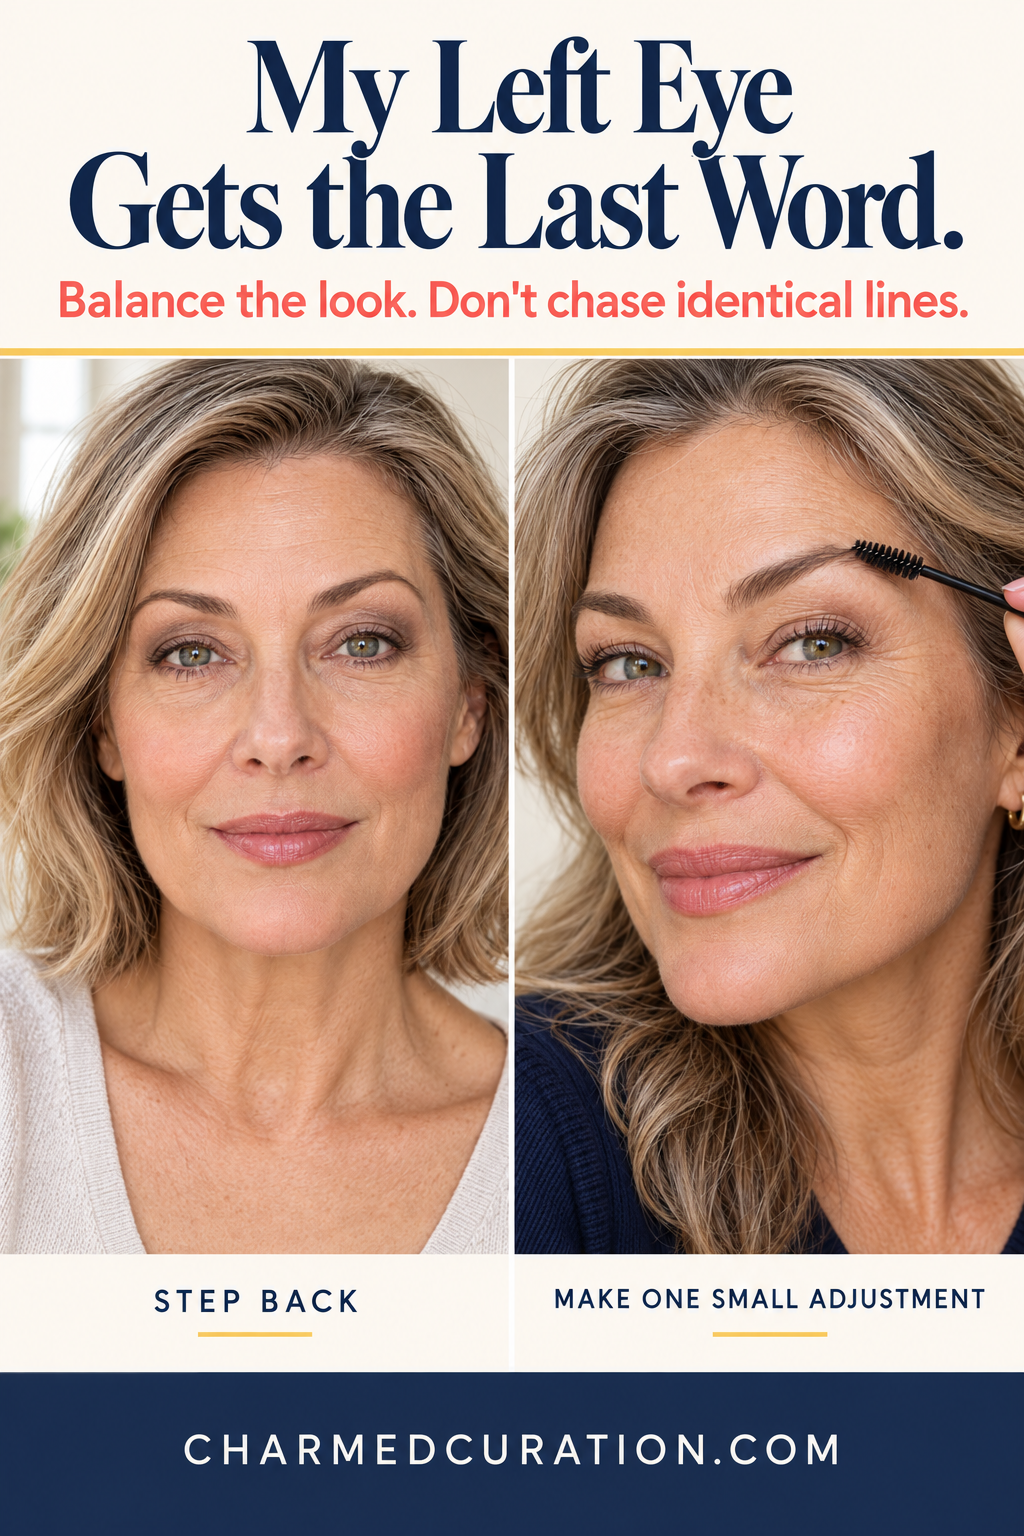
Give The Matte Shade Somewhere To Be Seen
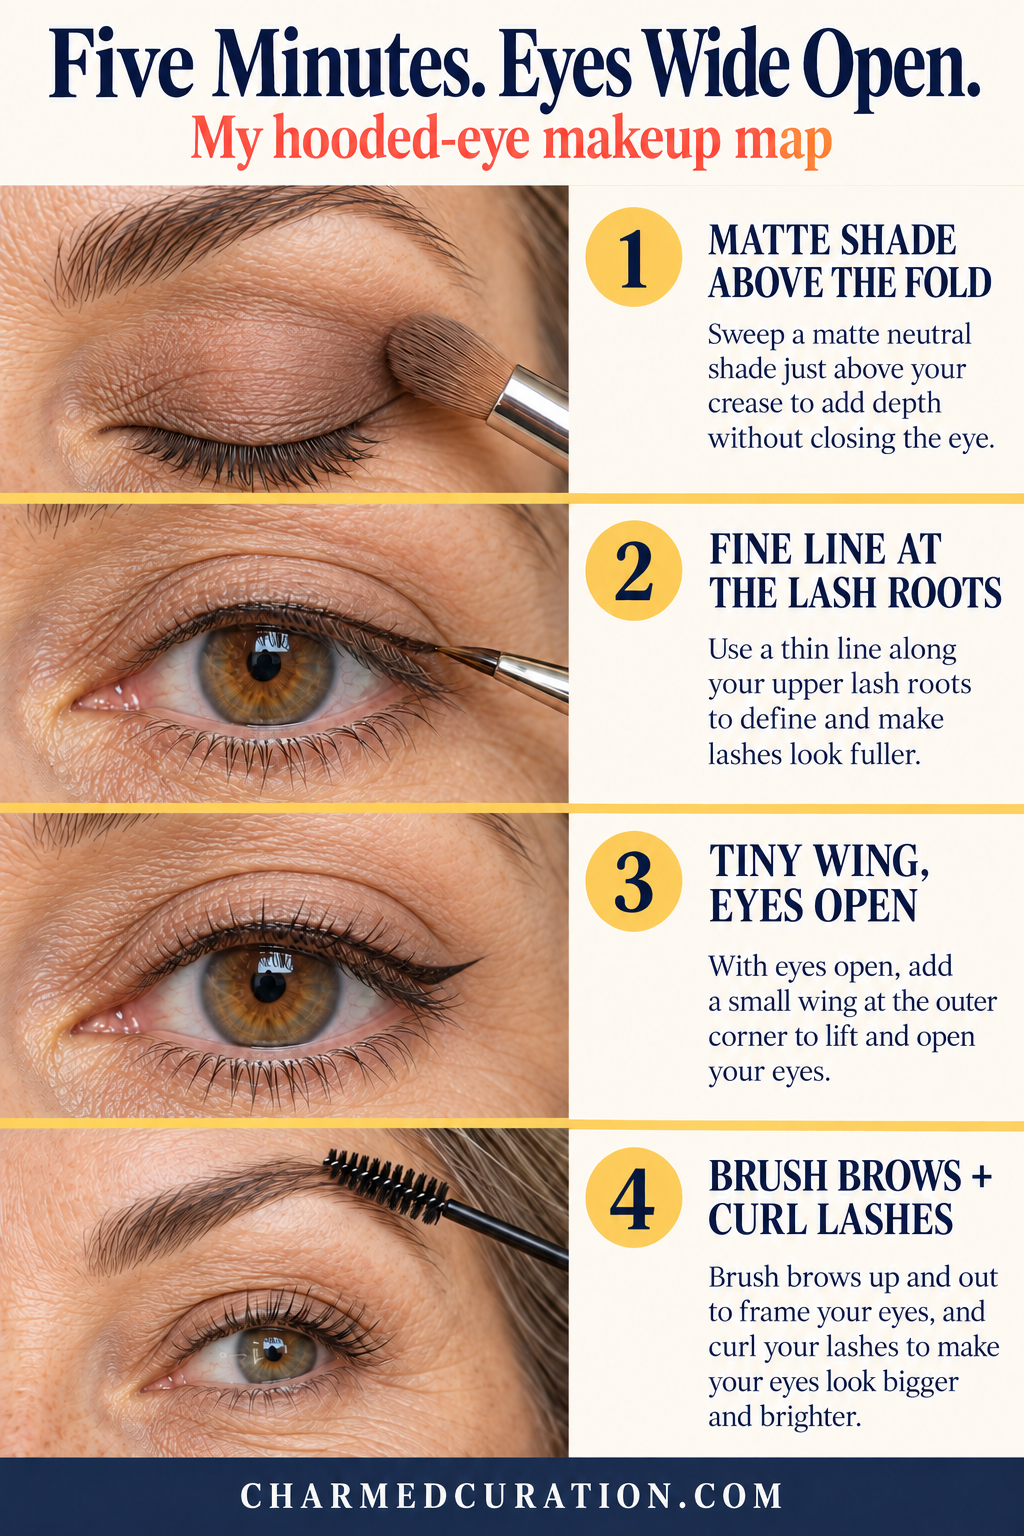
Here is the tiny change that makes the biggest difference: place a medium matte taupe or soft brown on the lid, then bring it just above the natural fold.
Check while looking straight ahead. If the color disappears, move the upper edge of the blend a little higher, not the entire shadow cloud.
On my left eye, that may mean placing the color a touch higher than on the right. It sounds uneven written down, but the visible effect can be beautifully balanced. Keep the outer edge soft and nudged slightly upward. Stop before it becomes a dark stripe beneath the brow.
One shade is enough to begin. No complicated palette choreography required.
Mirror check: With both eyes open, do you see a soft wash of matte color above the fold?
THE EYELINER / 03
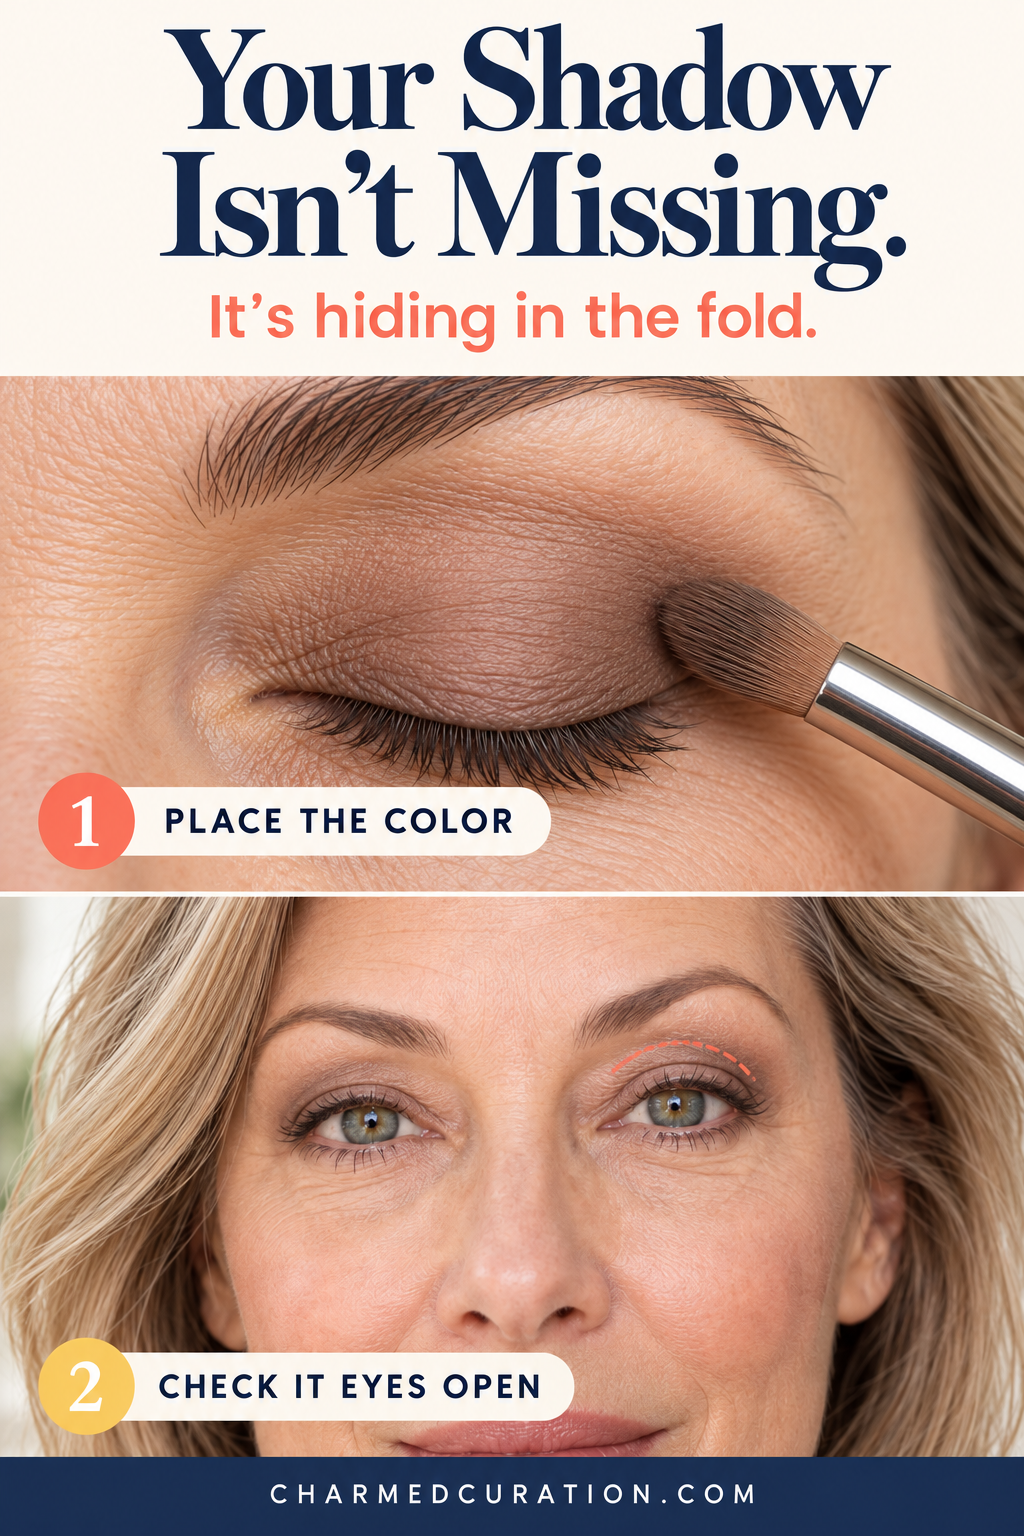
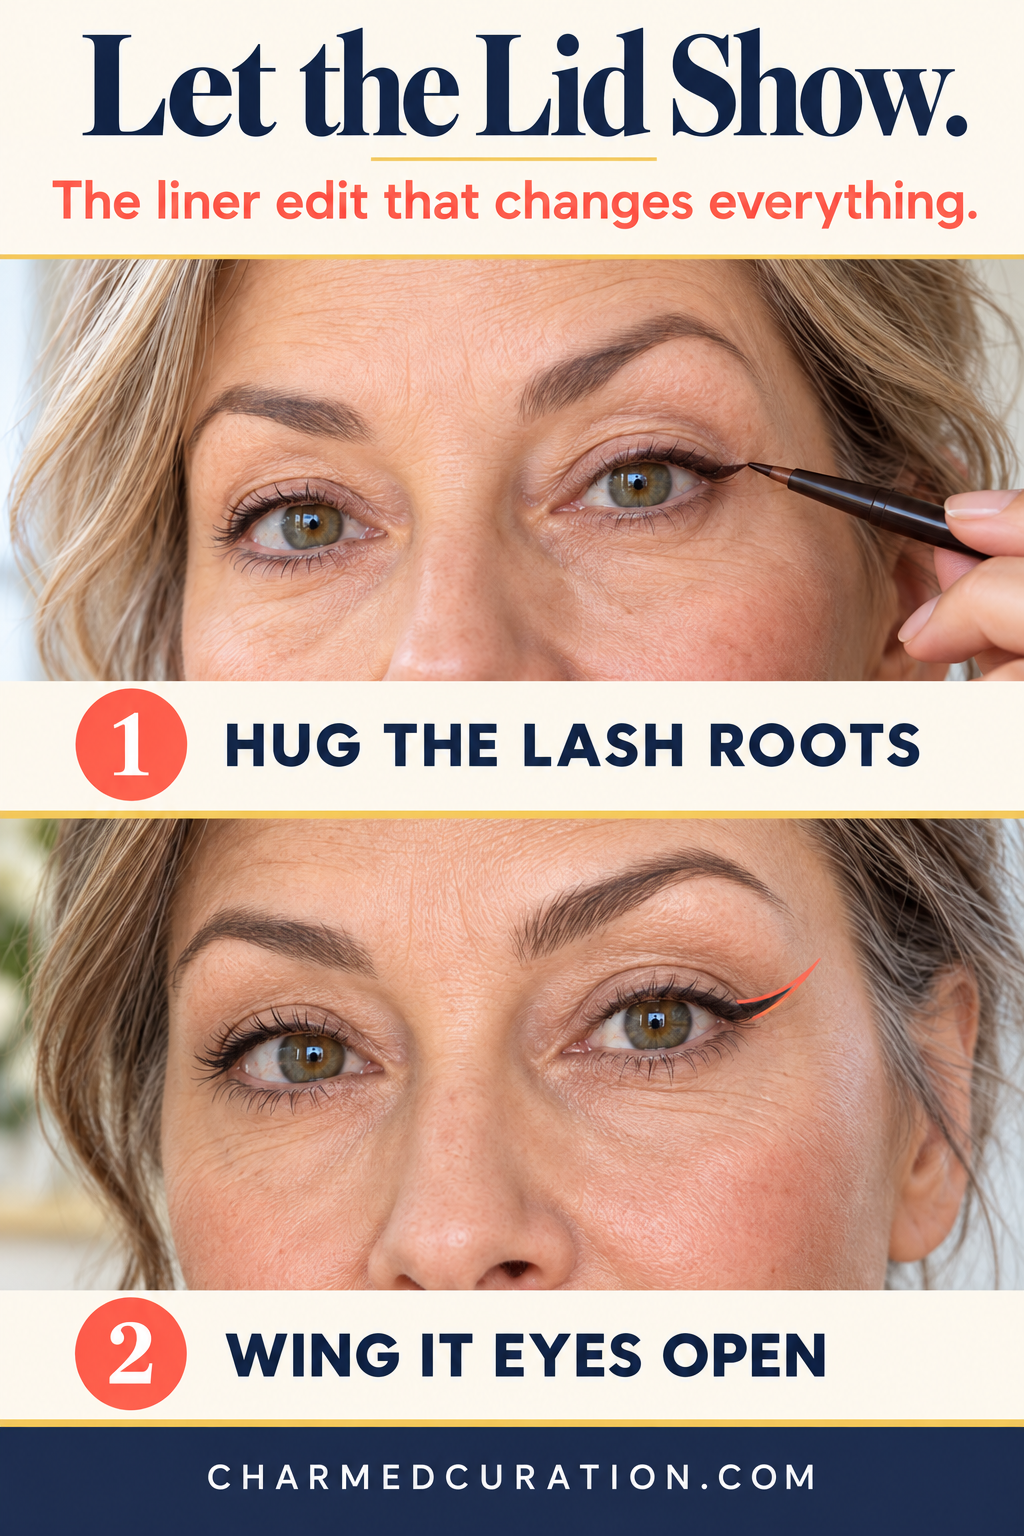
The line you almost cannot see
I know a bold black line can be bold and beautiful.
But when lid space is limited, a thick stripe can steal the show, and not in the way I want. A fine line at the upper lash roots adds definition while keeping the lid visible.
Start at the outer half of the upper lash line with a fine pencil or small brush. Make tiny connected marks, then stop and look straight ahead. I would rather add another hairline of color than try to take a broad line away. Brown and charcoal can be softer, but black is welcome if you love it.
Bobbi Brown’s guide recommends keeping definition close to the upper lashes.
The close-up below here shows exactly how much visible lid you can keep when the line is fine.
Mirror check: Do your lashes look more defined while you can still see skin above the liner?
THE OUTER CORNER / 04
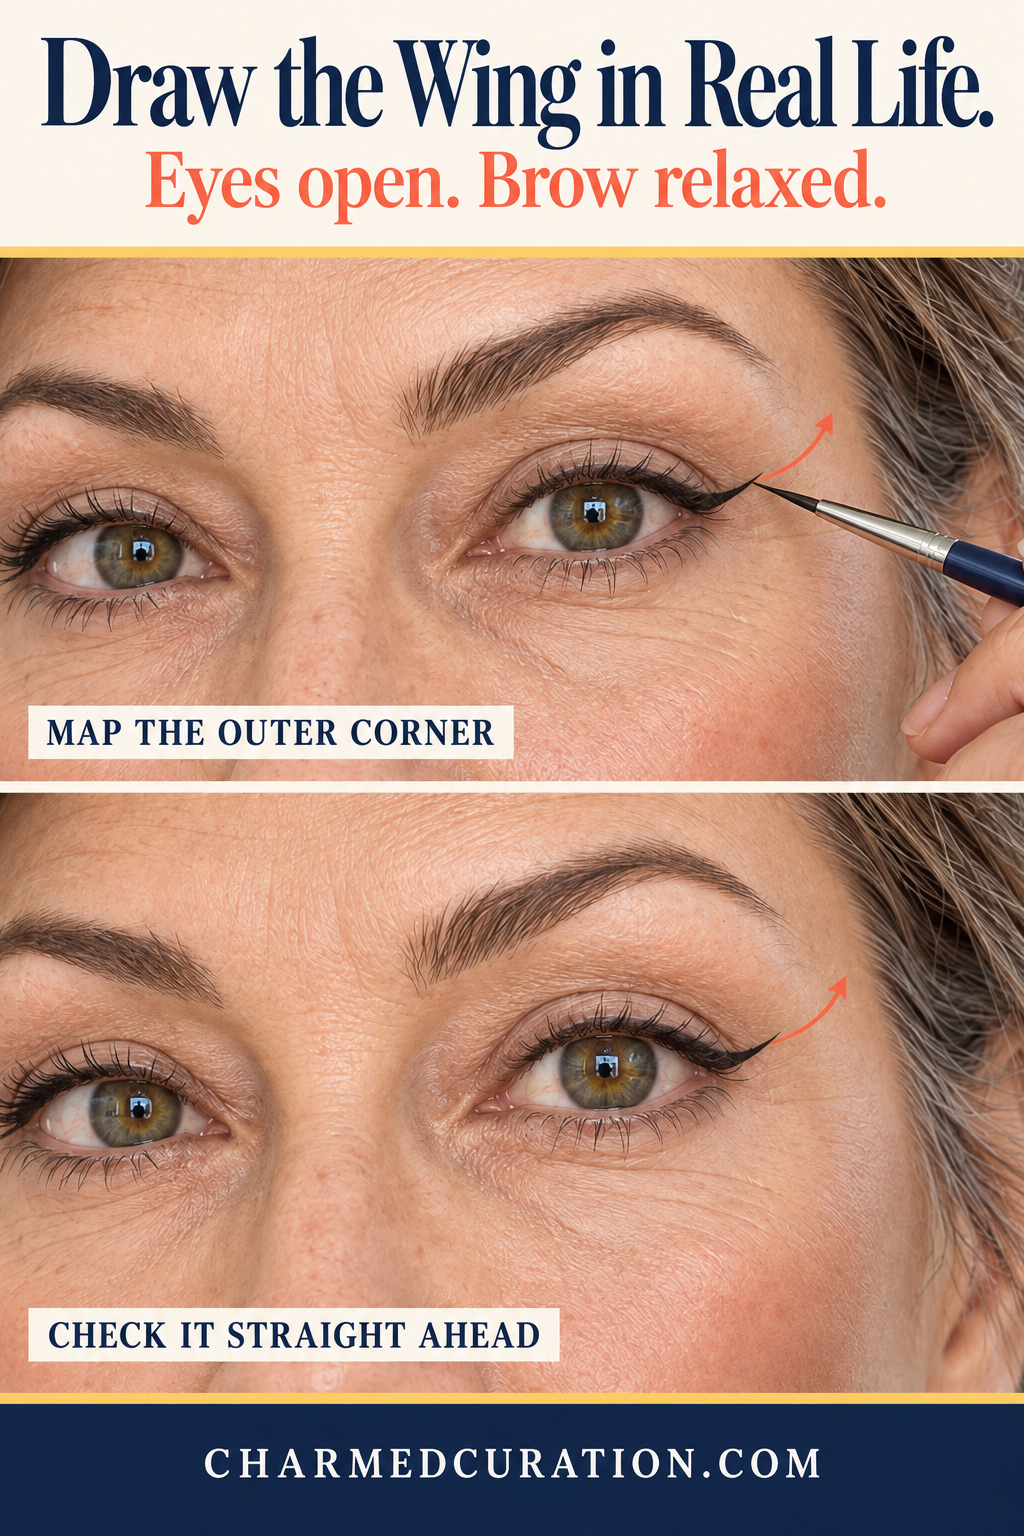
Draw the wing in real life
A wing drawn with the eye closed can fold into a hook the moment the eye opens. I would mark a tiny upward flick with both eyes open first, then connect it gently back to the lash line. It may look like an odd little shape when the lid closes. That is fine. Nobody is greeting my closed eyelids.

The left and right wings do not have to be identical millimeter for millimeter. Keep the final direction similar. If liquid liner feels too exacting, a short shadow flick with a small angled brush gives the same suggestion with more forgiveness.
Makeup artist Katie Jane Hughes demonstrates the eyes-open approach in this hooded-eye wing tutorial.
Mirror check: Does the flick point outward and slightly up when your face is relaxed?
THE LIGHT / 05
A tiny bit of light, exactly where it counts


Waterproof Liquid Eyeliner
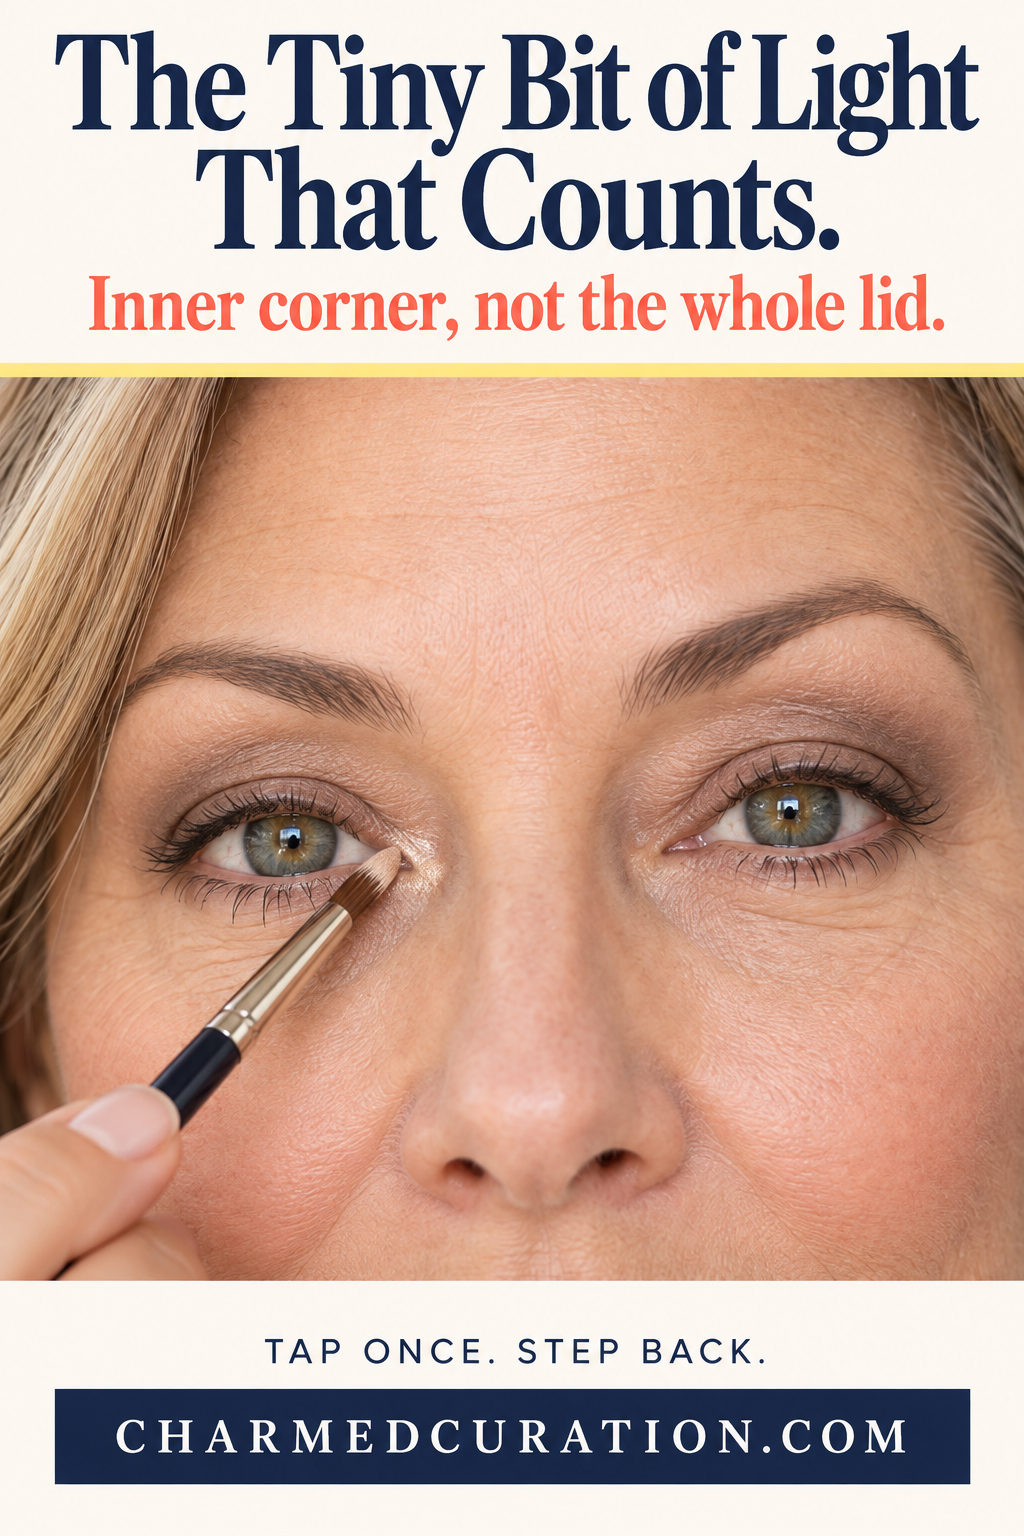
After the matte shade and the fine liner, I would add the smallest touch of champagne shimmer at the inner corner. Not an icy stripe, not glitter to the brow, just a pinprick of light where the eye begins.
It gives the look a little energy without competing with the soft shape on the outer third. Tap once and step back. If you can see the shimmer before you see your eyes, it is probably more than you need. Bobbi Brown’s tutorial uses inner-corner brightness with a matte shaping shade for this reason.
Mirror check: Does the inner corner look fresh, not frosty?
THE FINISH / 06
Let lashes and brows do the quiet lifting
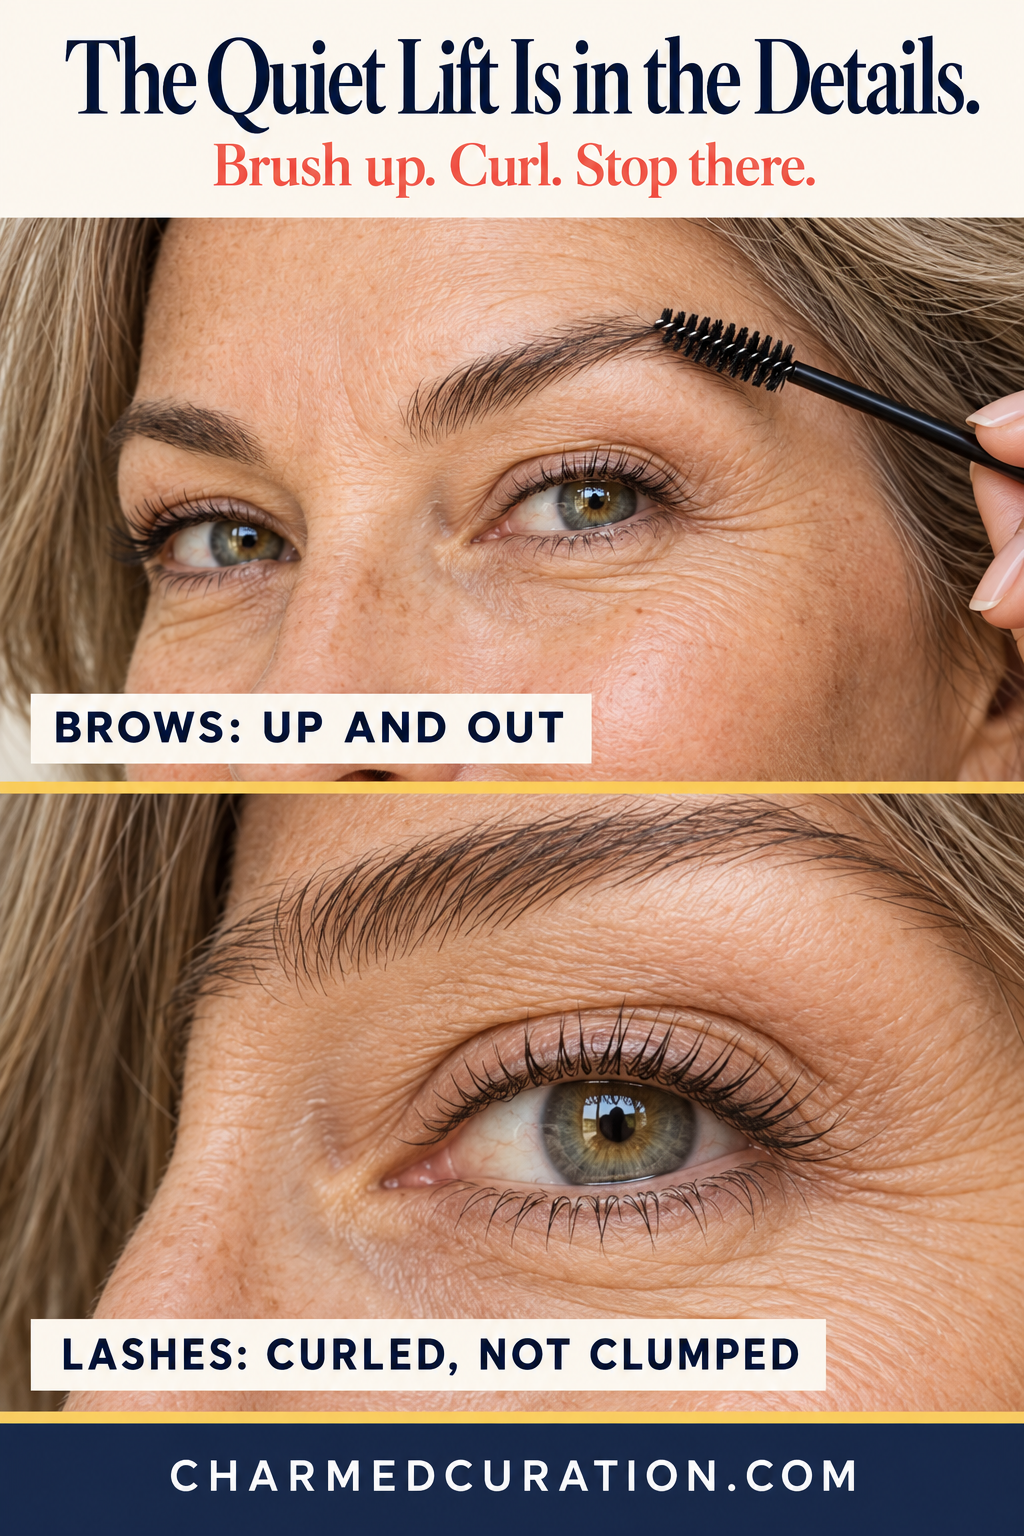
Before another coat of shadow, I would curl the upper lashes and brush the brows up and out. It sounds almost too simple, but it changes the direction of the whole eye look. A little mascara at the upper lashes is enough; clumps brushing against the hood are not the effect we are after.

For the brow, fill real gaps with short strokes and keep the tail soft. I do not need a dramatically new arch to look more awake. I need the brow hairs to point in a flattering direction. Charlotte Tilbury’s hooded-eye guide also treats brows as part of the overall eye frame.
Mirror check: Are the lashes separated and lifted, and does the brow tail feel light rather than heavy?
THE LAST LOOK / 07
Correct the left eye last, then leave it alone
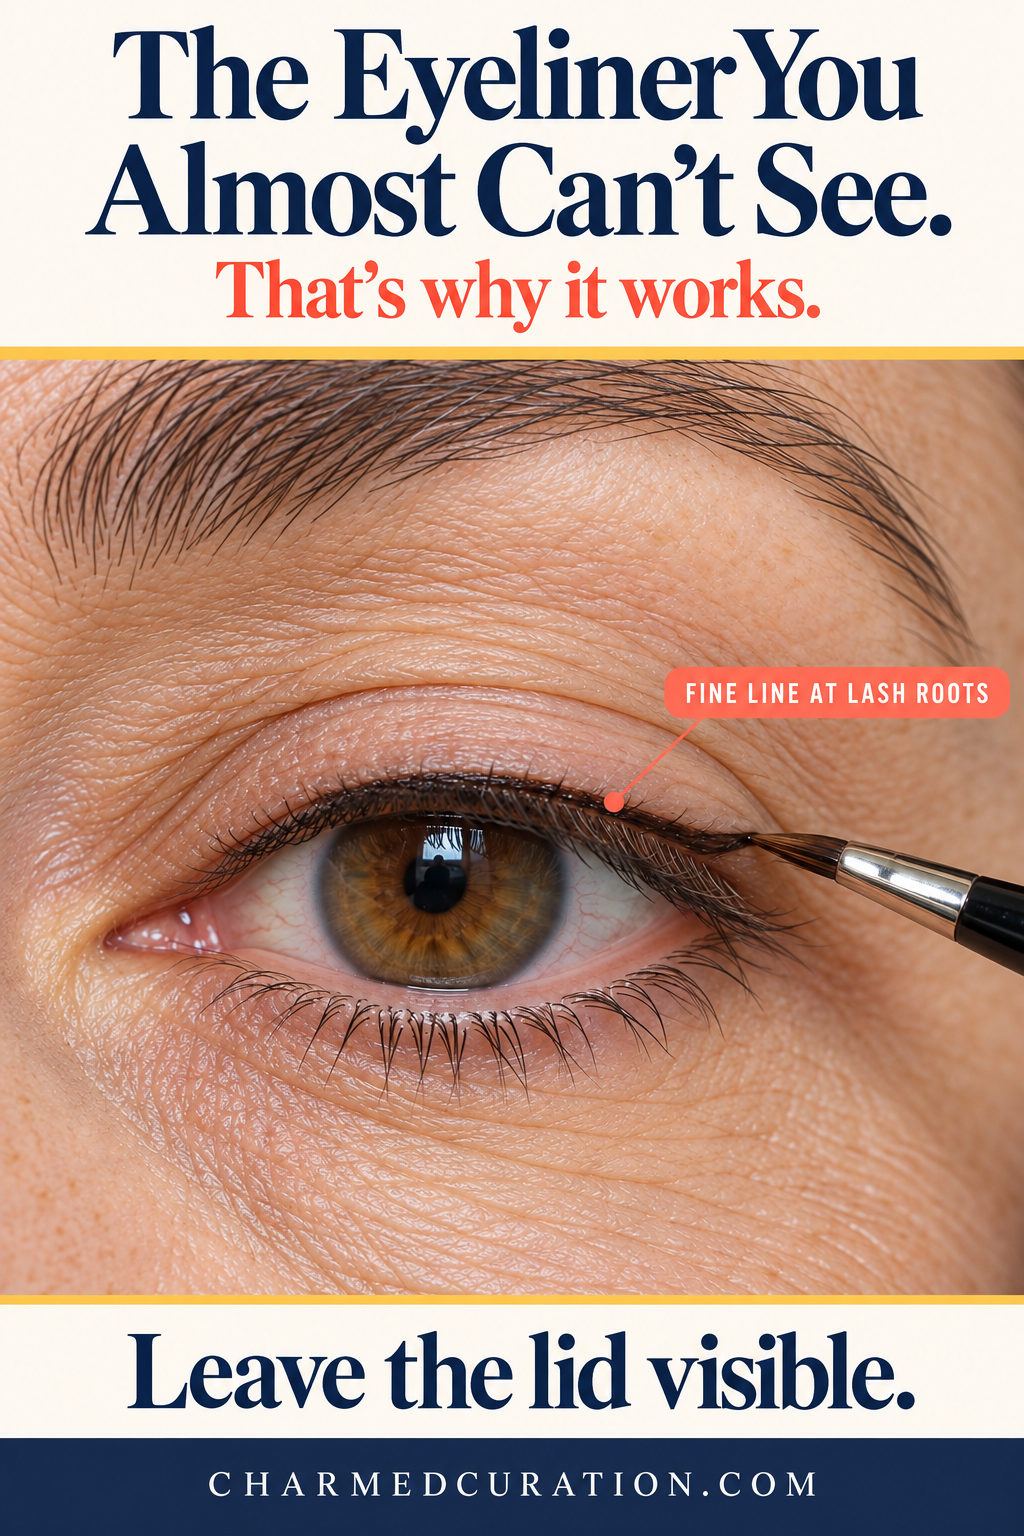
Here is the part most diagrams skip: I would finish both eyes, take one step back, and let the left eye have the last word. Maybe it wants the matte shade a fraction higher. Maybe the little wing should be shorter. Maybe it needs one careful pass of mascara on the outer lashes.
One adjustment. Then stop. I do not want to spend twenty minutes chasing a symmetry that faces were never required to have. I want both eyes to feel present in the same conversation.
Mirror check: Head level, forehead relaxed. Does the look feel balanced from a normal talking distance?
My five-minute version
Some mornings I want the idea, not a full eye-makeup seminar. One medium matte shade that stays visible with my eyes open. A barely-there line at the upper lashes. A little curl, mascara, brows brushed up, and one final look at the left side. That is it.
The first thing I would change is placement, not products. Try the eyes-open shadow check with what you already own. If the color finally shows up, you have learned more about your own eyes than another shopping cart ever could.
The photographs and tutorials here are illustrative, not images of me and not evidence of a physical eyelid change. My experience with the face-and-neck wand is personal; check the directions for any specific device before use.
Leave a Reply