

HOME / CRAFTS / BY STACEY SAVARESE
12 DIY Christmas Decorations
For a Cozy Home
For a home that feels like your Christmas…cozy and warm!
You know that feeling when you see a Christmas room you love and immediately start wondering what you could do with the things already in your house?
That’s where we’re starting.
These DIY Christmas decorations for a cozy home are about a few lovely details: a generous ribbon, branches with a little movement, soft light, and something you made yourself.
I love the mood of those red berry wreaths, creamy textiles, and little glowing houses. But I don’t think we need to buy an entirely new Christmas to get there.
A bowl you already own, a few fabric scraps, and the right ribbon can give an ordinary corner a very different feeling.
And please don’t feel you need to make all twelve. Pick the one you can already picture in your home. We can leave room on the kitchen table for dinner.
A few details that bring it together
START WITH WHAT YOU LOVE
Pull out one ornament, ribbon, or piece of fabric you want to see again. Let that be your starting point.
REPEAT A LITTLE COLOR
Carry the same red, green, or cream into two or three places. Everything doesn’t have to match.
GIVE THE RIBBON SOME ROOM
Long tails and loose loops add movement. Test the bow in place before cutting away the extra.
MAKE ROOM FOR REAL LIFE
Leave space for a coffee cup, a serving dish, and the things your family actually uses.
DIY Christmas decorations for a cozy home
| Project | Where to try it |
|---|---|
| 1. Paper star garland | A bookcase or quiet wall |
| 2. Fabric scrap tree ornaments | The Christmas tree or a gift package |
| 3. Dried orange and greenery garland | A shelf away from heat |
| 4. Personalized salt dough ornaments | The tree, with the year on the back |
| 5. Ribbon and evergreen doorway bundle | An entry door or hallway |
| 6. A softly lit window jar | A stable windowsill |
| 7. Handmade place-card ornaments | The Christmas table |
| 8. Paper Christmas tree display | A sideboard or entry table |
| 9. A woodland ornament bowl | A coffee table or console |
| 10. Fabric-wrapped Christmas parcels | Beneath the tree |
| 11. A family memory-card ornament box | A side table near the tree |
| 12. A dried citrus kitchen display | An open shelf or kitchen counter |
Charmed Tip: Before buying supplies, look through your ribbon, gift wrap, and fabric scraps. Choose one project, then buy only what is missing.
A little greenery care before you begin
Fresh cut greenery dries indoors, particularly near heat. University of Minnesota Extension’s guidance on fresh greens is useful when deciding where to put it. Use plants you can identify, keep decorations away from heat and out of reach of children and pets, and remove drying material promptly.
Make something lovely, one project at a time
01 Paper star garland
Where to try it: A bookcase or quiet wall

A few cream paper stars against a dark bookcase can be so pretty. You don’t need an elaborate folded design, either. Flat stars are an easy place to start, especially if you’d rather spend your afternoon decorating than following a complicated folding diagram.
Try cream with kraft paper, or add just one deep red star. The mix has enough interest without needing glitter on every surface.
Gather: Cardstock, a pencil, scissors, a hole punch, and twine or narrow ribbon.
- Draw a star on scrap paper and cut it out to use as your template. Trace six to eight stars onto cardstock.
- Cut them out and punch a hole near the top of each, leaving enough paper above the hole so it won’t tear easily.
- Thread them onto twine. Adjust the spacing on the shelf or wall before securing each star with a small knot.
Charmed Tip: Try a short length first. If the stars keep turning sideways, use two holes across the upper points rather than one.
02 Fabric scrap tree ornaments
Where to try it: The Christmas tree or a gift package
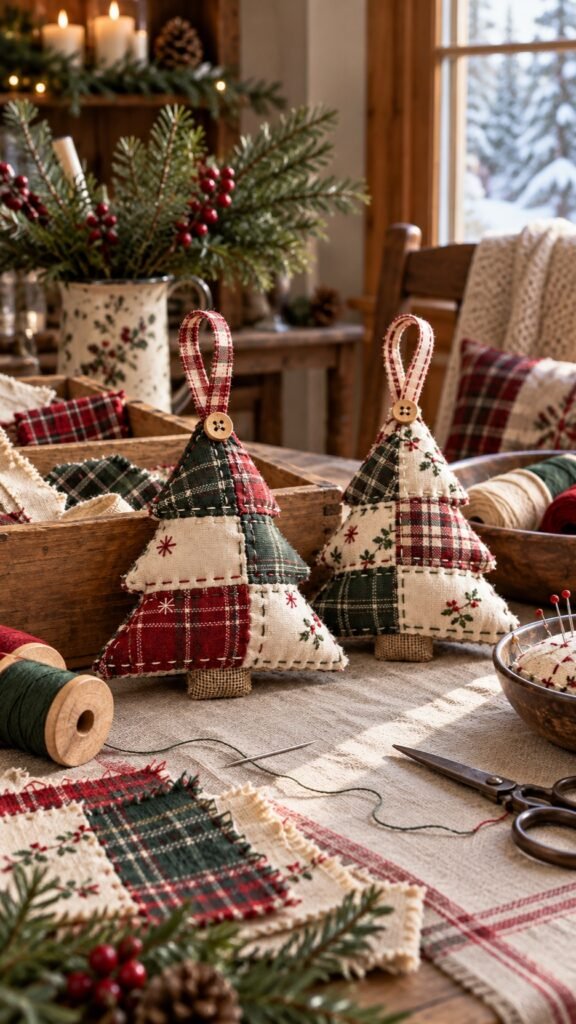
This is where that small piece of fabric you’ve been saving finally gets its moment. A little plaid tree, a cream felt heart, or a soft red circle can look lovely tucked between the ornaments you already have.
I’d keep the shapes simple and let the fabric do the work. Felt is the easier choice if you want to leave the cut edges showing. Woven cotton needs a little more attention to fraying.
Gather: Felt or fabric scraps, thread, a needle, a little stuffing, scissors, and ribbon.
- Cut two matching shapes. Make them large enough to stitch comfortably, rather than trying to work around tiny points.
- Place the shapes together and sandwich a ribbon loop between them at the top. Stitch around the edge, catching the ribbon securely and leaving a small opening.
- Add a small amount of stuffing, then close the opening. A lightly filled ornament will keep its shape without becoming bulky.
Charmed Tip: Use the same ribbon for the hanging loops. It helps different scraps feel like they belong together.

Tegeme 40 Pcs 10×10” Christmas

FuWeave 60 Pcs 10 x 10 Inch

32 oz. | Machine Washable, Smooth Consistency, for Toys, Dolls, Cloud Decor, Craft Projects
If this has you reaching for the sewing basket, our easy sewing projects for beginners are a good place to keep going.
03 Dried orange and greenery garland
Where to try it: A shelf away from heat
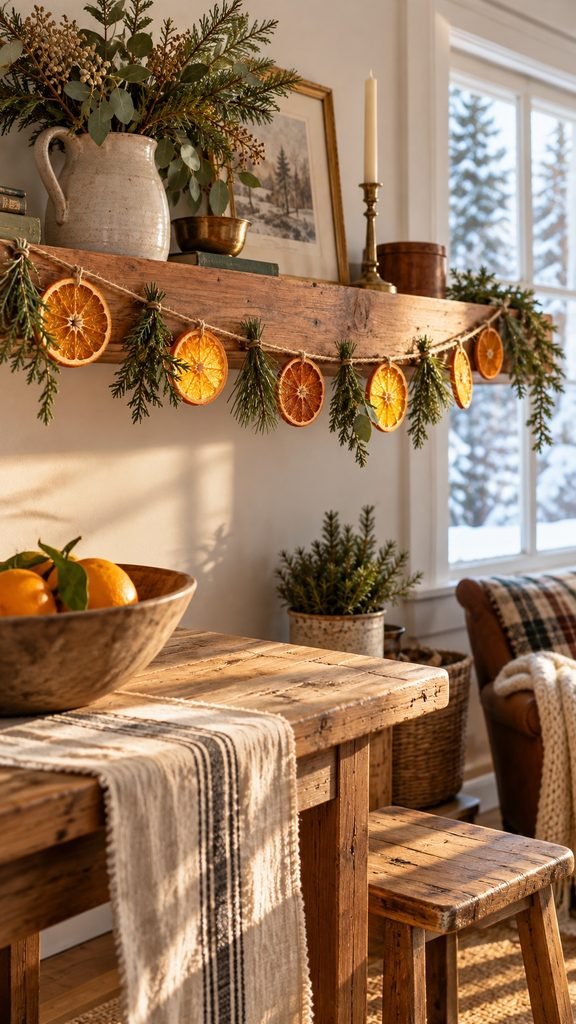
There is something lovely about orange against deep green, especially when the afternoon light catches the slices. It adds a little color without another box of ornaments.
Use fully dried slices, bought ready to use if that makes the project more enjoyable. This is a temporary seasonal decoration, not something to assume will stay fresh for weeks.
Gather: Fully dried orange slices, twine, a large needle, and small pieces of identified greenery.
- Lay out the orange slices on a table and decide how much space you want between them.
- Thread each slice near its edge, handling it gently so it doesn’t split. Tie small knots to keep the spacing in place.
- Tie short greenery pieces between a few slices, then hang the garland where you can inspect it and remove drying material easily.
Charmed Tip: Skip the fireplace for this one. Keep dried fruit, paper, ribbon, and greenery well away from flames and heat.
04 Personalized salt dough ornaments
Where to try it: The tree, with the year on the back

These are the ornaments that don’t need to impress anyone. A slightly uneven star with a name on the back can be the one everyone wants to find next year.
Keep the decorating simple: a painted initial, a red edge, or a little pattern pressed into the surface. You can make a whole set without needing twelve different paint colors.
Gather: A reliable salt dough recipe, cookie cutters, a straw, paint, and hanging ribbon.
- Prepare and dry the dough according to your chosen recipe. Before drying, cut the shapes and use a straw to make a hanging hole.
- Wait until the ornaments are fully dry before painting. Follow the paint manufacturer’s drying instructions.
- Add names and the year to the back, then thread the holes with ribbon.
Charmed Tip: Salt dough decorations are not food. Keep the dough and finished ornaments away from pets and young children who might put them in their mouths.
05 Ribbon and evergreen doorway bundle
Where to try it: An entry door or hallway
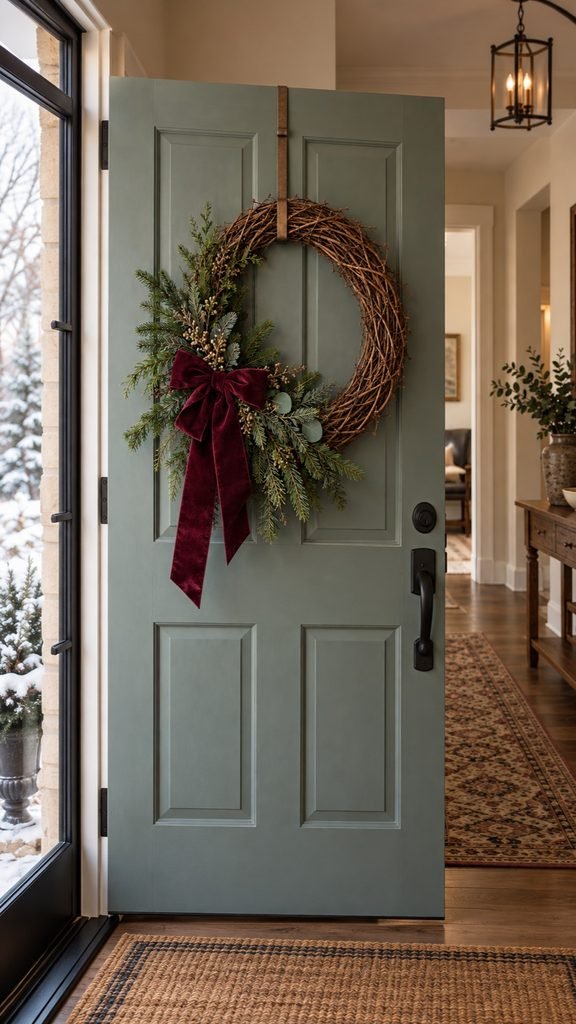
This is the one I’d start with if you want a noticeable change without a big afternoon project. A few branches and a generous bow can be enough, especially on a plain door.
Use cuttings from your own yard only when you can identify the plant and harvest it appropriately. You don’t need to take a large branch. A few smaller pieces give you more control over the shape.
Gather: Identified evergreen cuttings, floral wire, ribbon, wire cutters, and a suitable hanging hook.
- Lay the longest cutting at the back. Arrange shorter pieces over it, keeping the stem ends together.
- Wrap the stems with floral wire and tuck the cut wire ends safely inward. Add a separate secure hanging loop.
- Cover the fastening with ribbon. Hang the bundle, then adjust the bow and trim the tails where they look best.


22 gauge

Charmed Tip: The bow should hide the fastening, not hold the entire bundle together. Check that your hook can support the finished piece.
06 A softly lit window jar
Where to try it: A stable windowsill
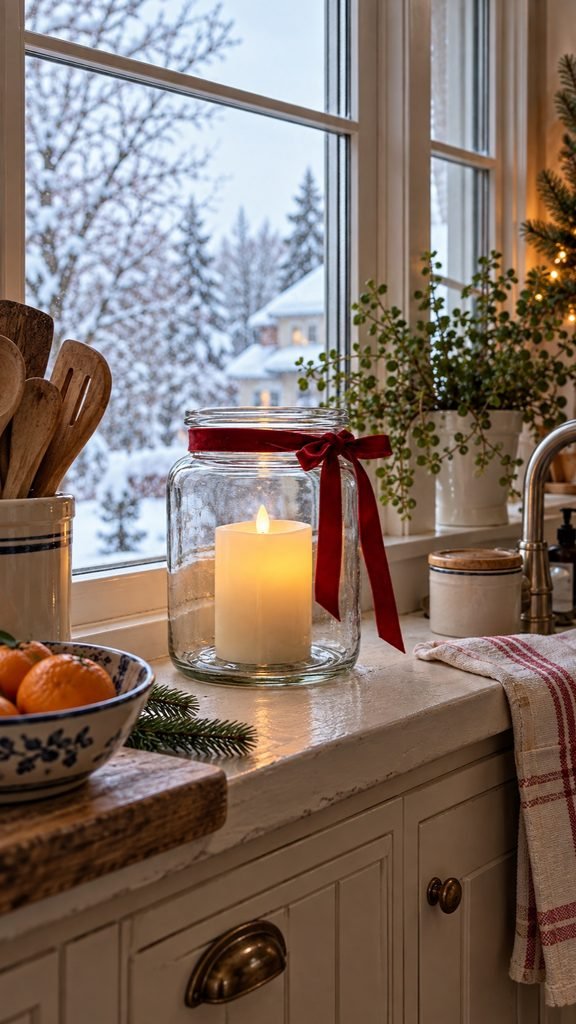
By late afternoon, a small light in the kitchen window can be more inviting than another large decoration. This is a lovely use for a plain glass container you’ve been keeping in a cupboard.
You don’t need to fill every inch of it. Let the candle and glass be the main detail, with a ribbon around the outside if you want a little color.
Gather: A clean, wide glass jar, a battery-operated candle that fits, and a short length of ribbon.
- Choose a stable jar with an opening wide enough to insert and remove your battery candle easily.
- Place the candle inside, following its instructions and keeping its controls accessible. Don’t pack greenery around it.
- Tie ribbon around the outside of the jar and set it somewhere it won’t be knocked over or pulled down.

Remote Candles with Candle Grease, Pack of 2 Timer LED Battery Operated


Burgundy/Dark Red/Red Ribbon, Soft Frayed Cotton Ribbon for Gift Wrapping, Tree Bows, Wreaths
Charmed Tip: Use a battery candle, not a real flame, for this project. Keep batteries and small decorative pieces out of children’s reach.
07 Handmade place-card ornaments
Where to try it: The Christmas table
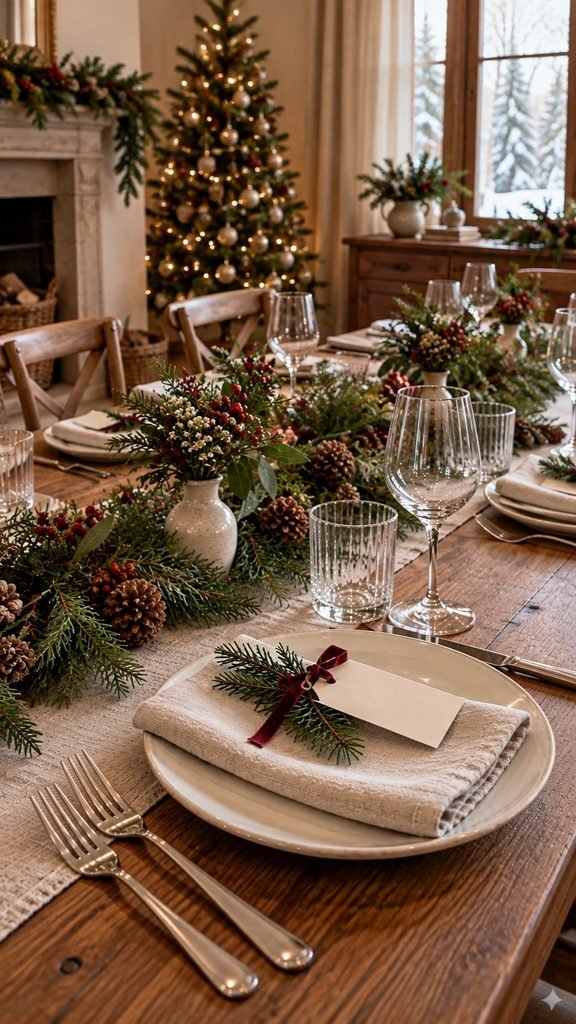
A handwritten name is such a small thing, but it makes a place setting feel considered. It says, ‘This spot is yours,’ without needing a completely new set of Christmas dishes.
Use the plates you enjoy and let the ribbon bring in the holiday color. A cream tag and a red bow can do quite a lot.
Gather: Cardstock, a pen, a hole punch, narrow ribbon, and small wooden ornaments or cinnamon sticks.
- Cut simple tags and write each name clearly, leaving room at one end for a hole.
- Thread ribbon through the hole and tie the tag to a small ornament or cinnamon stick.
- Place the finished piece on a folded napkin, keeping craft materials separate from food.
Charmed Tip: Test one place setting before making the rest. If the bow takes over the plate, narrow ribbon will be easier to manage.
08 Paper Christmas tree display
Where to try it: A sideboard or entry table
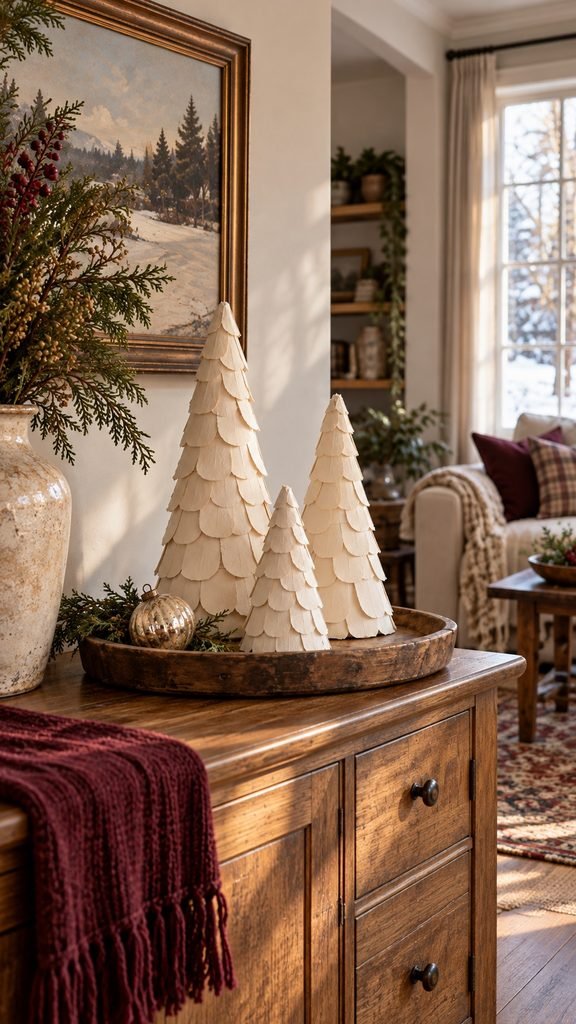
If you love the little Christmas village look, a group of paper trees is a simple handmade way to bring some of that charm home. It won’t pretend to be a ceramic village, and it doesn’t need to.
Try three trees at different heights. Cream cardstock feels clean and quiet; pages from an already damaged book give you more texture. Leave the treasured books on the shelf.
Gather: Sturdy paper, scissors, glue or double-sided tape, and a tray.
- Cut a broad paper sector, like a large slice of pie. Bring the straight edges together to form a cone and overlap them until you’re happy with the shape.
- Secure the overlap and trim the bottom so the cone stands level. Make two more in different sizes.
- Arrange them on a tray with a few existing ornaments. Keep paper displays away from heat and candles.
Charmed Tip: Make a practice cone with scrap paper before cutting your good paper. A slightly wider base will stand more reliably.
09 A woodland ornament bowl
Where to try it: A coffee table or console

Sometimes the bowl is the decoration you’ve been overlooking. A wooden salad bowl or a simple ceramic serving bowl can give a handful of ornaments a completely different feel.
Pinecones add texture, while one or two familiar baubles keep it festive. If you gather anything outdoors, inspect it carefully and leave damp, moldy, or insect-damaged pieces outside.
Gather: A bowl you own, clean dry pinecones, a few ornaments, and ribbon.
- Choose a bowl that leaves useful space on the table around it.
- Arrange the largest pinecones first, then tuck in a few ornaments. Turn their hanging caps inward if you don’t want them visible.
- Add a loose ribbon bow at the rim or nestle one among the pieces. Stop before the bowl is overflowing.
Charmed Tip: Don’t use a food bowl for serving again until you’ve emptied and cleaned it. Keep loose pieces where children and pets can’t reach them.
10 Fabric-wrapped Christmas parcels
Where to try it: Beneath the tree
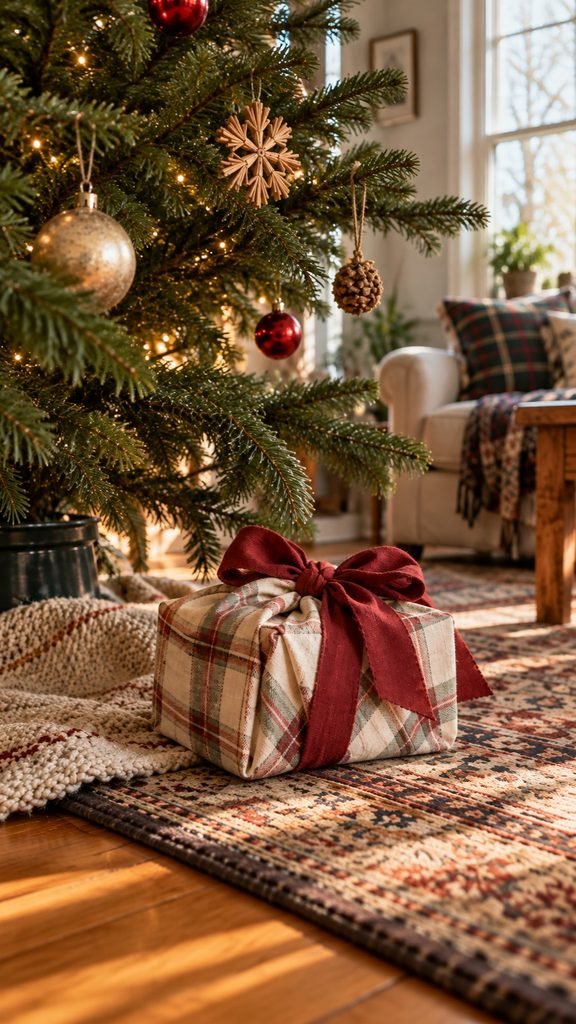
The presents become part of the room long before anyone opens them. Fabric wrapping is a lovely way to bring in a little plaid, a soft cream, or a color that connects with your tree.
You don’t have to sew for this version. If you enjoy sewing, hemming the edges gives the cloth a more finished look for another year.
Gather: Fabric, scissors, ribbon, and boxes or gifts to wrap.
- Place the box diagonally on the fabric and test the folds before cutting. Leave enough cloth for the corners to meet comfortably.
- Fold one pair of opposite corners over the box. Bring the remaining corners together and tie them, or secure the folded cloth with ribbon.
- Turn the parcel around and adjust the folds. Add a paper name tag rather than writing on fabric you hope to reuse.
Charmed Tip: Thin fabric is easier to tie around a small box. Save heavier cloth for larger parcels so the knot doesn’t overwhelm the gift.


60″ Wide, 100% Cotton, Medium Weight, Sold by the Yard
For something handmade to put inside those parcels, take a look at these Christmas gifts to sew.
11 A family memory-card ornament box
Where to try it: A side table near the tree

Not every Christmas decoration needs to be something you hang. A little box of family memories can sit beside the tree and become part of the evening when people settle in.
Keep the invitation easy. ‘What made you laugh this year?’ is often a friendlier place to start than asking everyone for a profound life reflection before dessert.
Gather: A small box, cardstock, pens, and ribbon.
- Cut cards that fit inside the box and put the year at the top of each.
- Leave a few pens nearby and invite people to write a memory if they’d like to. Little drawings count, too.
- Bundle the cards with ribbon after the holiday. Keep each year’s group together so you can bring it out again.
Charmed Tip: Ask before displaying someone else’s message. A private memory can stay in the box and still be meaningful.
12 A dried citrus kitchen display
Where to try it: An open shelf or kitchen counter
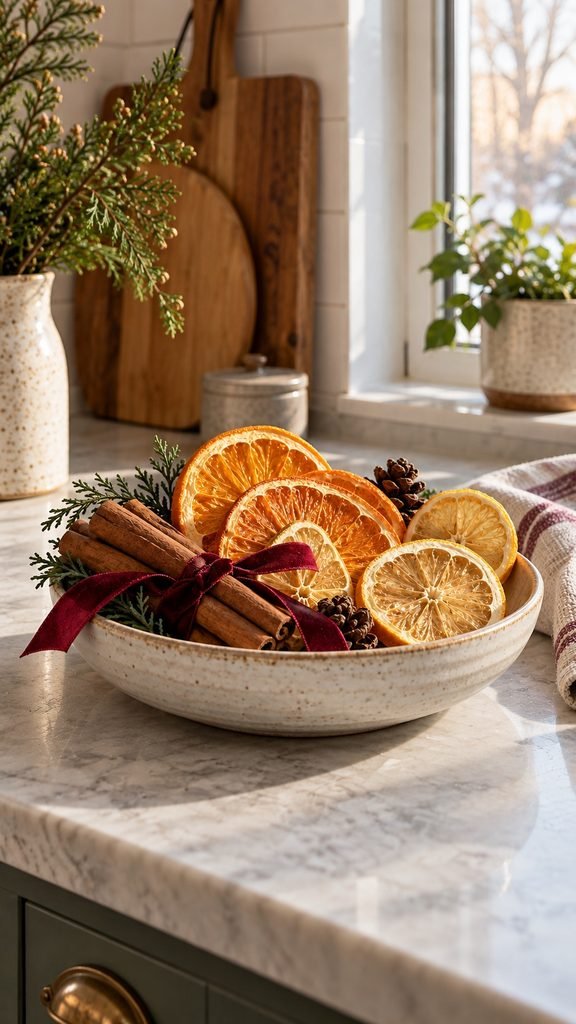
The kitchen deserves a little Christmas, too, but it still has to work as a kitchen. A small dish of dried citrus and cinnamon sticks gives you a seasonal detail that can move out of the way when you need the counter.
Think of this as a decorative arrangement, not a simmer pot recipe. No unidentified garden cuttings, no heating instructions, and no extra pan to watch while you’re doing everything else.
Gather: Fully dried citrus slices, cinnamon sticks, a small dish, and ribbon.
- Choose a small, dry dish and add a few fully dried orange slices.
- Lay cinnamon sticks across them and tuck a loose bow beside the dish rather than burying it underneath.
- Keep the arrangement away from the stove, sink splashes, and food preparation. Discard any material that becomes damp or moldy.


6.4oz Bottle (38 42 Sticks) | Warm,Sweet-Spicy,Cinnamon Sticks Perfect for Tea/Beverages/Potpourri/Mulled Wine & Holiday Baking

Rustic Pinecones | Strings for Garland, Christmas Tree Ornaments, Easter Wreath Making, Vase/bowl Filler Decor
Natural Pine Leaves Needles, Real Greenery Cedar Stems
Charmed Tip: Make it small enough to lift with one hand. If moving the decoration becomes a project, it probably needs fewer pieces.
Start with the corner you keep looking at
I’d start with the doorway bundle or the ornament bowl. You can see the change right away, and both help you decide which colors you want to carry into the rest of the house.
Then live with it for a day. See how the ribbon looks in the evening, or whether you like the little window light while you’re making dinner. You can always add another detail later.
The part worth keeping is that moment when you walk into the room and think, ‘Oh, that looks lovely.’ It doesn’t have to look like anyone else’s Christmas. It should feel like yours.
Keep Reading
15 Easy Christmas Gifts to Sew That People Will Actually Use
A Cozy Winter Day at Home: From First Cup to Firelight
A LITTLE CHRISTMAS, YOUR WAY
One corner is a lovely beginning.
Choose a project you actually want to make. Let the rest of the house follow when you are ready.
Leave a Reply